Yard Work 2002-2007

Click on any Picture for larger size

Back to Lee Home Page             Go to Final View

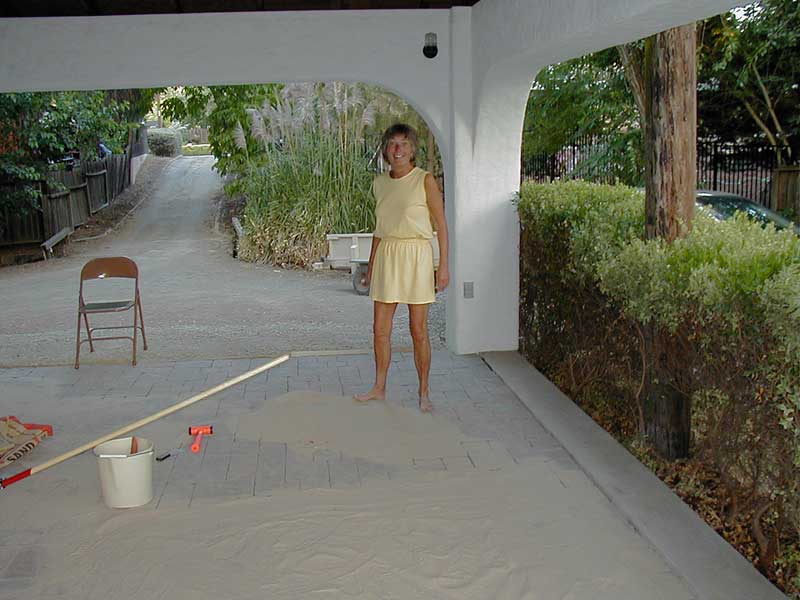
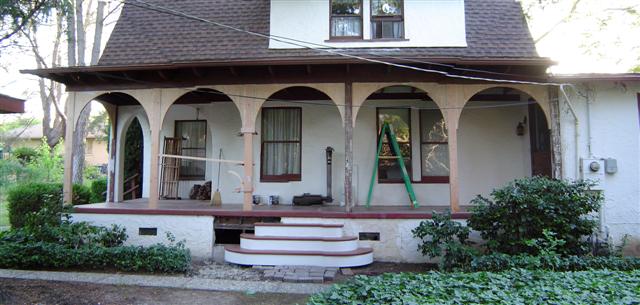
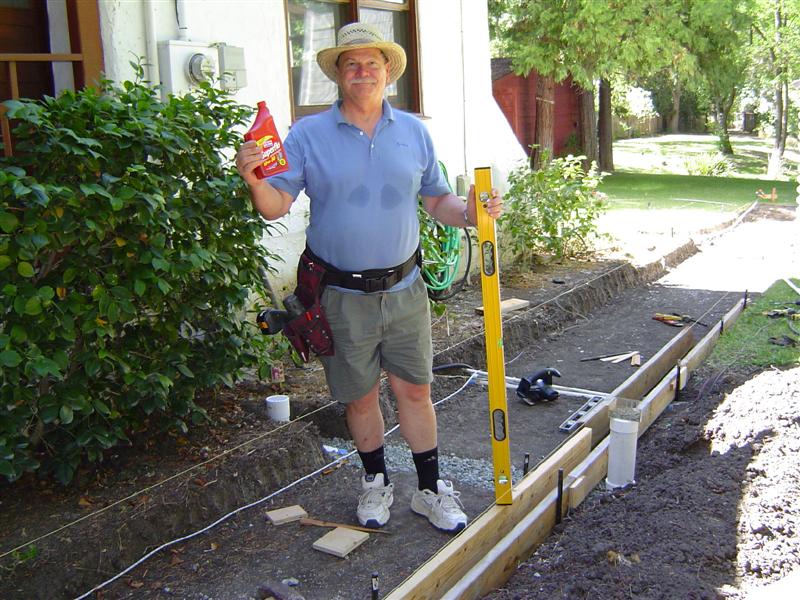
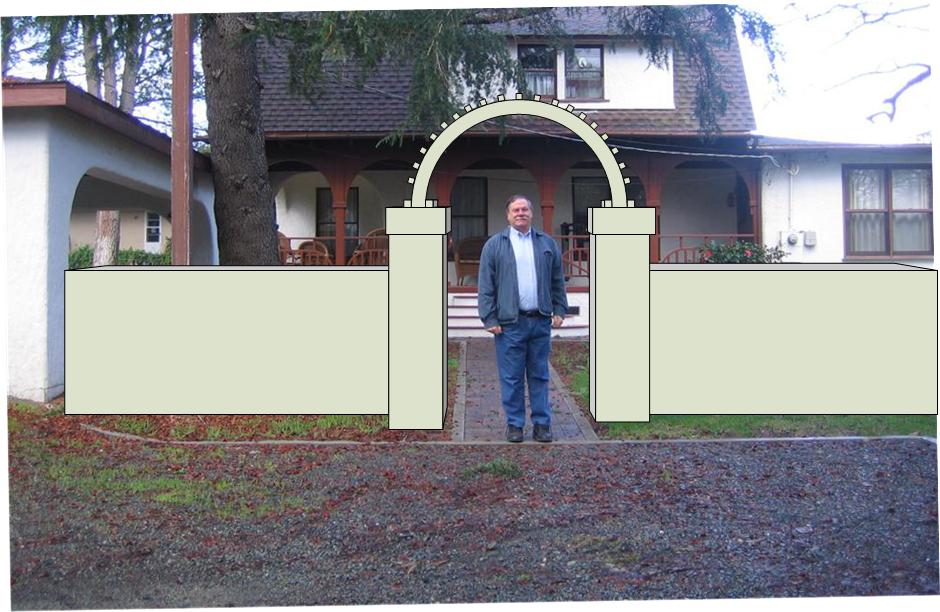
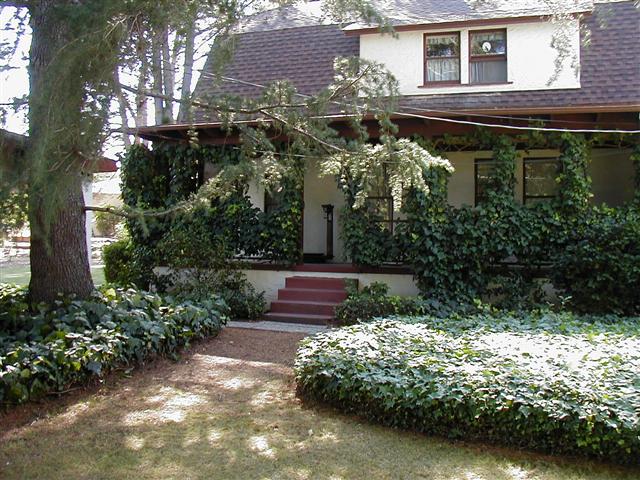
Before

This picture taken in 2002 shows the start of the main project. It really was hard to find the entrance to the home.  This was a 'side entrance' of the original home when the main entrance was to the left in the picture.


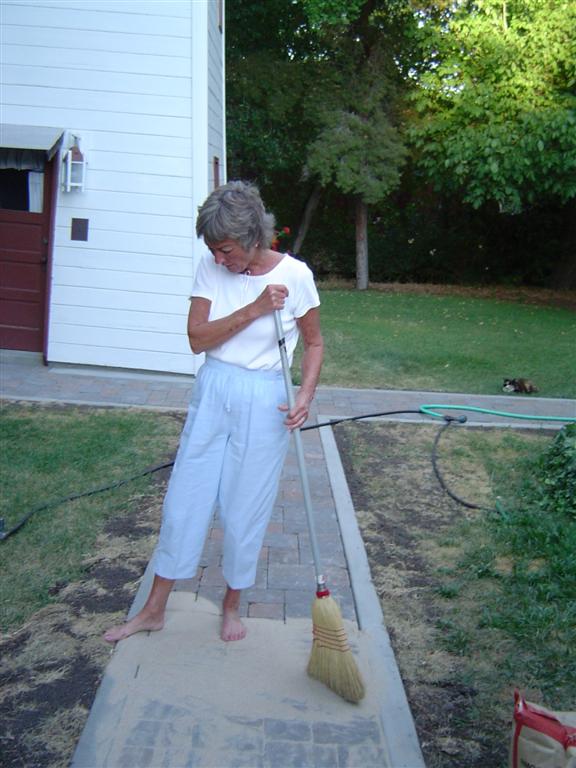
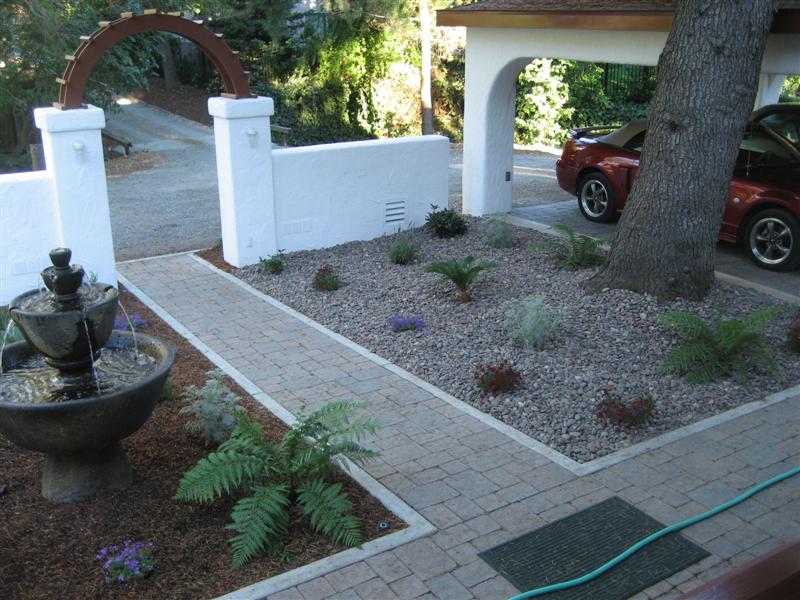
Carport Pavers - 2002

One of the first orders of business was to install pavers in the carport.  The gravel which was there for 15 years was well compacted.  A fun job for Jo is spreading the fine sea sand to lock the bricks in place.  Good practice for the Hawaii Vacation! 


Design by Modeling - 2003

First, we use all the neighborhood's green recycle cans to strip the ivy off the porch.  Wow, what a difference!  But we want to add a bit of interest so we try some decorative effects for the porch roof columns. Jo says she is a visual person. This tests solid vs. open arches.


New Stairway

Jo inspects the new stairway which is built on the porch during the rainy winter.  Neighbor Bob's suggestion of sweeping circular corners sounds a lot easier than it is.  These stairs were considered a prototype and were replaced with a larger set in 2006.


Jackhammer

The concrete stairs which were installed around 1951 have really hardened.  And concrete was cheap then, so the stairs are almost solid.  Hired help is definitely the order of the day.  Fortunately, we have a local concrete recycler.  Several truckloads of concrete netted a grand total of 4500 pounds!  That is a lot of grunting.


Progress Report

Stairs installed temporarily and only one original column is left.  The new archways are made of plywood glued back to back .. clamped by putting bags of sand on the components.


Shop Work

John recycles the old handrails to make the new ones.  Wonderful, old growth fir that gets used twice.  Here the shop equipment is put to good use.


More Pavers

Now down to some serious excavation to make way for new sidewalk. First dig, then dig some more.  Install the side retaining concrete ( a mixer is a necessity).   Place gravel and compact it well.  Now a leveling bed of concrete sand.  Finally place the pavers.  Takes a while, but the results are great.  This activity reminds John of the digging of the Panama Canal.


Done for the Summer - 2003

A lot of work for the year!  Time to go to Hawaii on vacation.


Still More Sidewalk - 2004

John poses for a 'Uniflow Motor Oil' commercial - his concrete release agent of choice.  More digging takes the concrete paver sidewalk around the side and back.  But see below for the mound of dirt left behind.


Jo Helps With The Fun Part

Something about sea sand and feet.  Although she has a broom, seems that placement of the sand in the joints by toe is more accurate.  This part of any paver project is always best left to the beach expert.


Lots of Dirt - 2005

2005 finds John doing a lot of Habitat work and helping with the Lee home in San Francisco.  So the pile of dirt from all the paver excavation sits there growing weeds.  We do plan for next year by hiring a Landscape Architect to help with the 'Master Plan'.


A Water Feature Arrives - 2006

The Master Plan has a 'Water Feature' to emphasize the entrance. While shopping around, Jo finds just the one on sale.  So early in the morning, John gets to the nursery to ensure there is enough help to get it loaded, taking 6 burley nursery workers (an oxymoron)? 


880 Pounds of Fountain Installed

After a few bags of concrete for a support and a bit of shoring, John manages to get the fountain parts off of the trailer and in place.  (The great trailer traces its roots back to 1972, the year Peter was born.)  Ramps, levers and just plain sweat is all it takes.


Planning

With the help of Photoshop and some graphics, John lays out the tentative plan to see if will meet Jo-Ann's expectations and comply with the Master Plan.  Based on this schematic, we proceed with construction.


Wall Under Construction

Now some fun stuff with just plain old concrete foundation, stud walls and chicken wire over plywood.  This photo is done with plywood just placed against the wall to assure Jo we are on track with the original concept.


Getting Close to the End

OK!  Check this picture against the top one or click on button below for a picture for a comparison / progress picture.  Click on this picture itself for a neat picture of the proud owners.

See Comparison


Landscaping - 2007

The pile of dirt was still growing weeds.  So we find Alfonso and his brother on Craig's List and he helps with the final landscaping.  Just the savings from being able to buy plants at contractor prices pays for the cost of the labor.  And it sure was easier!

.


Before - 2002

DONE!

After - 2007


Back to top